
Who likes wine and cheese? THIS LADY! I have been a wine supporter for many years now but recently delved into the world of cheese. Wine is kind of "our thing" because we live by vineyards; people come to visit and we serve wine, cheese, salami, etc. I don't know anything about cheese. I know more about defusing bombs than I know about cheese and let me tell you, I know very little about defusing bombs.
This is where serendipity comes into play.
I first saw this cutting board at William and Sonoma, LOVE.

After finding this tutorial for DIY cutting boards on Centsational Girl and I knew I could do this.
After finding this tutorial for DIY cutting boards on Centsational Girl and I knew I could do this.
AND THEN.....
I went to a winemaker's class on Saturday with my father and husband and the topic was wine and cheese pairing! (The class is at Callaway Winery and is awesome, I highly recommend it)
Which lead me to this lovely conclusion:

A monogrammed cheese board.
Materials:
- A section of untreated wood, also called "green". (I used 1-3/4" thick Douglas Fir, it is a softer wood but has worked great so far)
- Jigsaw or scroll saw
- Sand paper, 80 & 220 Grit
- Template (I printed mine on the computer)
- Wood burner (I bought mine at Michael's Crafts, $13.99 and I used a 50% off coupon= $7)
- Mineral Oil
Instructions:
1. Choose a shape for your cutting board, I chose a standard shape from Microsoft Word. Print the template, cut it out and trace onto your wood. Square is good too!
2. Use your jigsaw or scroll saw to cut the wood.

3. Sand the wood with 80 grit sandpaper, then move to 220. Make sure you sand all sides.
4. Wipe your cutting board down to remove all dust.
5. I printed my monogram on the computer and used an ancient secret for transferring it to the wood.
Ancient Secret
- Print your monogram (you can also use simple clipart).
- Flip your monogram over and use a pencil to shade the back of your picture, cover the entire monogram.
- Flip picture back over and place on your cutting board, tape down to prevent it from slipping.
- Trace the right side of the monogram completely using a ballpoint pen.
- Remove the paper and admire your work! The lead on the back of your picture was transferred to the wood when you traced the right side.
6. Now you are ready to burn the monogram into your wood. I don't have any tips for this, just be careful, take your time and follow the manufacturer instructions. Also, practice on a piece of scrap wood before attempting to burn your cutting board.
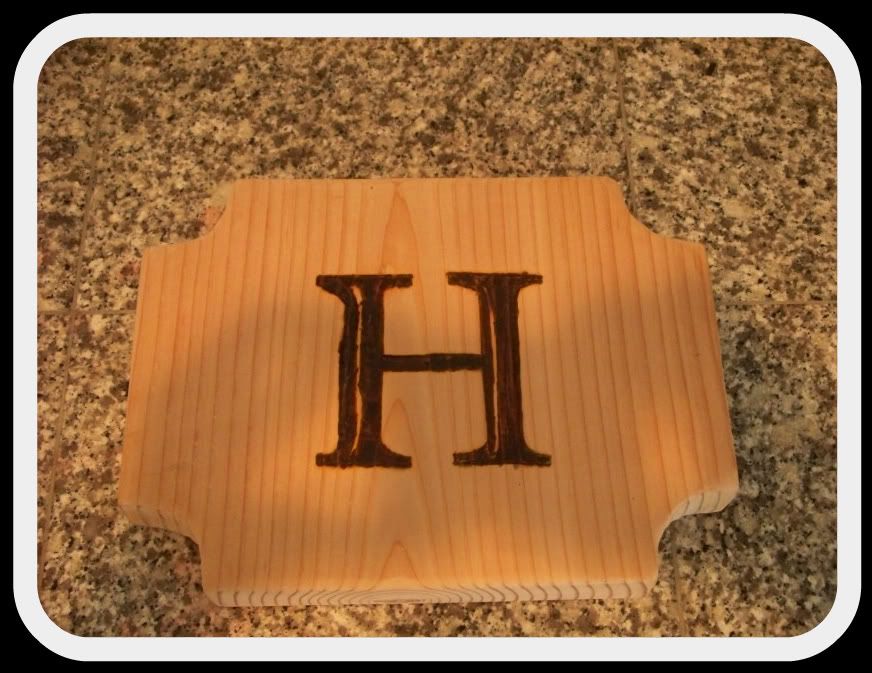
This is the cutting board before the application of mineral oil.
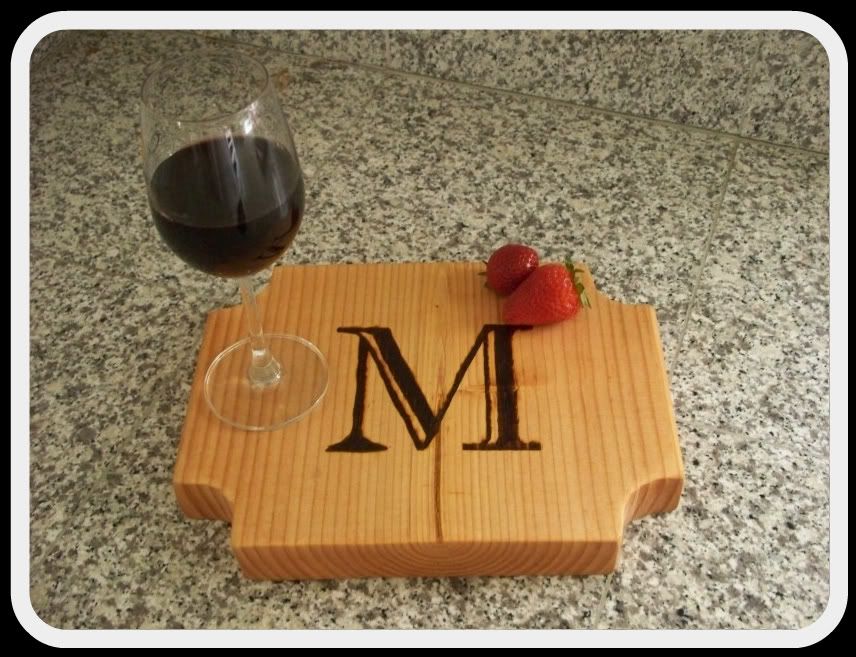
7. Once you have the monogram burned in to your satisfaction rub the mineral oil into the wood and enjoy! You need 2-3 coats of mineral oil properly coat your cutting board.
Invite some people over (or none at all) and serve some cheese and wine!
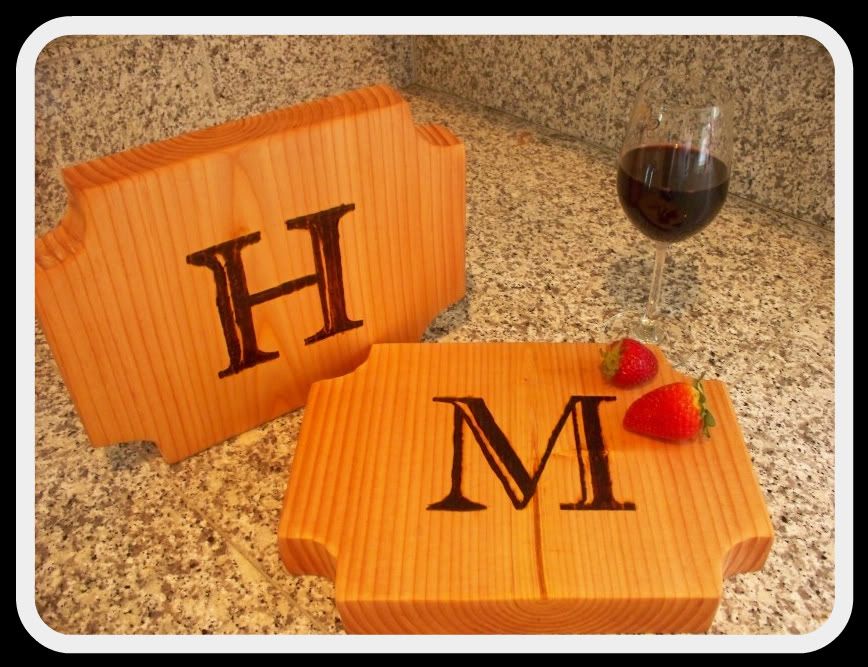
If you are not inclined to using power tools I am selling these at my Etsy Shop. Mentioned you were referred from my blog for a 10% discount.
I *highly* recommend blue cheese with a white dessert wine. I don't like either but the combination was magical.
Just for fun, here are the combinations we tried in wine class:
First Course
Wine: Callaway Winemaker's Reserve 2008 Bella Blanch (Sparkling)
Cheese: Le Delice des Cremiers
Second Course
Wine: Winemaker's Reserve 2008 Sangiovese
Cheese: Brebis Ossau-Iraty
Third Course
Wine: Winemaker's Reserve 2008 Cabernet Sauvignon
Cheese: Extra Sharp Canadian Cheddar
Fourth Course
Wine: Winemaker's Reserve 2010 Late Harvest Chardonnay
Cheese: Castello Blue Cheese
This would be a great gift! Might need to venture into the world of power tools!
ReplyDeleteMelissa
www.lovebugliving.com
Do it, Melissa. I am really surprised how well it went for me. I had never used power tools until a couple of months ago. Start small with the cutting board :)
ReplyDeleteI tell myself it is the same as drawing... I am just using a saw, LOL.
Wow! You did a great job. I love the monograms and it would make such a great gift. Thanks for linking to the Home Decor and Organizing Link Party. I'm featuring this on the Facebook fanpage today. Grab a featured button if you'd like.
ReplyDeleteWow girl. I am totally impressed. Great job!!
ReplyDeleteThank you so much for linking up to Strictly Homemade!! You are awesome!!
I am making this today....times 5 because I am giving them as Christmas gifts. Thanks for the beautiful idea!! Something to keep in mind, if you are going to use it to put food on, the wood should be food safe. Oak would NOT be a good choice, even though it's a nice, hard wood because of the tannins. Maple and Cherry are nice choices. Poplar is food safe as well as beech, ash and apple.
ReplyDelete